I am a self-taught sewer, so I run into sewing dilemmas frequently. Some things I can figure out on my own. Some things I kind of "wing" and make it work. Sometimes I have to find an answer somewhere. Sometimes I go online and search for answers through google.com. But the best sewing resource by far is the Sewing Mamas group. Time and again they've answered questions or talked me through a sewing "procedure."
 Recently I started making cloth diapers again. Originally I was making fitted diapers, and after a purchasing a diaper pattern and using that for a while, I adjusted it and started doing my own thing. No problem. But this time around I wanted to try making one-size (OS) diapers with a waterproof layer. I like the idea of making one type of diaper again and again. So as I do, I got all excited to get started, so I set to work with the materials I had on hand, and produced a diaper. But not without issues.....

 First of all, I am using snaps. I have snap pliers, and an assortment of snaps. I have applied them before. I was familiar with the process. These diapers take about 20 1/2 snaps each. (oy) So it's work, and it takes time to carefully apply each part. Carefullly, because about 1 in 4 snaps ends up getting smashed. Why is this? Well, I thought it was because I just wasn't lining the snap up correctly in the snap pliers. And it was. But wasn't this a problem that everyone had? I mean, I don't mind redoing the occasional snap, but this was getting ridiculous. And frustrating. And wasteful. So I investigated the situation by doing a search online. Well, it came as no surprise that there are different pieces that go with the snap pliers. It also came as no real surprise that you could order the parts. But if you owned the older version of the pliers, the new parts would have a funny fit. Review after review stated that the new parts on the older pliers made for a very tight squeeze for the snaps. Ugh. So that means new pliers. The new ones have many reviews touting the better snap fit. Seems like the way to go if I'll be making diapers. Ok, so that's in the works.
The next issue is working with PUL. Again, I have nothing to reference with this, or people to ask, so I tried it on my own. Sewing PUL to another fabric is like trying to get a slippery eel to lie still next to, well, anything. It was everywhere. Well, everywhere except where I needed it to be. Frustrating to say the very least! This time I appealed to the Sewing Mamas group. And as always, I got lots of great suggestions. The first of these was to use a walking foot on my sewing machine. Ok. I have one of those, but have never used it. I couldn't figure out how to put it on my machine. All of the other feet snap into place. This one did not. I didn't have a clue, and no instructions came with the foot. Admitting this to the SM group resulted in links to photos and instructions. =) It took about half a minute to put it on. (I've owned the thing for over a year-lol!) I was very eager to try it out. I did so. The PUL did not slip sideways. It moved through the machine with ease. Until I got toward the other end of a diaper. The PUL piece was pushed about one inch beyond the piece I was sewing it to. Ak! Frustrating! But a step in the right direction. The SMs assured me PUL can be tamed. I need to keep trying. Some other suggestions included using tissue paper as a stablizer, using two-sided tape or a glue stick to hold the fabric together, using a teflon foot, and so on. I wonder if sewing certain parts of the diaper first, rather than sewing around in one loop would be helpful. Anyhow, these are things to play with.
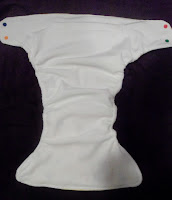 The one other area of this particular diaper pattern was understanding how to make the pocket in the back of the diaper. The instructions in the pattern were unclear to say the least, but with a few trials (and a few errors!) I figured it out. There is little that is more satisfying than figuring out a tricky sewing step! It's the sort of thing that keeps me going when I can't get through something. (Such as working with PUL) The pattern had no pictures with it, and the written directions assumed a lot of sewing experience. The result is a nice looking pocket.
Update: Several things have made this whole process much easier. For one thing, I recently received a new batch of snaps from the KAM snap company. It is evident that others had the same problems with smashing snaps that I did, as they are made differently now! The areas that smashed on the old style snap are now much thicker. Problem solved! So I am still using the snap pliers I have always used, and they work perfectly with the new, improved snaps. Excellent.
Regarding the PUL, I have found that the use of my walking foot along with having the PUL-side of my project facing DOWN, I can successfully sew with PUL! I also tried using tissue paper, which works fine, but I really don't think I need it. I just sewed a diaper together using this method, and it worked great. No slipping, sliding side to side, stretching, nothing. I did carefully guide the fabric to be sure things were lining up well, and I would recommend always doing so. But I am very happy to have a system that works!
As far as the pattern goes, I hit another step that caused me some pause. This time it was using velcro on the wings of the diaper. The step is quite simple, but I got hung up on the working in the pattern. Many times while sewing I have come across the term "right-sides together." Simple enough. In this pattern, the author uses the term "wrong-sides facing." On an earlier step in the pattern, the front and back of the diaper pieces were to be sewn together inside-out and then flipped. We were instructed to put the pieces "wrong-sides facing." So I translated this to mean right sides together. So, wrong sides facing out, I figured. No problem. But when it came to the velcro on the wings, the instructions said to put the hook and loop pieces "wrong-sides facing." HUH? The velcro tab needed to end up being wrong-sides together, and stitched together this way. How on earth do you start that with right sides together?? I could not for the life of me figure out how that would work. I ended up stitching the pieces together wrong-sides together, then sewing the tab onto the wings. Which was just as it was to be done. So what am I missing here? I always assume it's something I'm not getting, not a mistake in a pattern, and maybe it will suddenly make sense. But not yet. Anyhow, the diapers are coming together well at this point, and I am very happy with them.


The next issue is working with PUL. Again, I have nothing to reference with this, or people to ask, so I tried it on my own. Sewing PUL to another fabric is like trying to get a slippery eel to lie still next to, well, anything. It was everywhere. Well, everywhere except where I needed it to be. Frustrating to say the very least! This time I appealed to the Sewing Mamas group. And as always, I got lots of great suggestions. The first of these was to use a walking foot on my sewing machine. Ok. I have one of those, but have never used it. I couldn't figure out how to put it on my machine. All of the other feet snap into place. This one did not. I didn't have a clue, and no instructions came with the foot. Admitting this to the SM group resulted in links to photos and instructions. =) It took about half a minute to put it on. (I've owned the thing for over a year-lol!) I was very eager to try it out. I did so. The PUL did not slip sideways. It moved through the machine with ease. Until I got toward the other end of a diaper. The PUL piece was pushed about one inch beyond the piece I was sewing it to. Ak! Frustrating! But a step in the right direction. The SMs assured me PUL can be tamed. I need to keep trying. Some other suggestions included using tissue paper as a stablizer, using two-sided tape or a glue stick to hold the fabric together, using a teflon foot, and so on. I wonder if sewing certain parts of the diaper first, rather than sewing around in one loop would be helpful. Anyhow, these are things to play with.

Update: Several things have made this whole process much easier. For one thing, I recently received a new batch of snaps from the KAM snap company. It is evident that others had the same problems with smashing snaps that I did, as they are made differently now! The areas that smashed on the old style snap are now much thicker. Problem solved! So I am still using the snap pliers I have always used, and they work perfectly with the new, improved snaps. Excellent.
Regarding the PUL, I have found that the use of my walking foot along with having the PUL-side of my project facing DOWN, I can successfully sew with PUL! I also tried using tissue paper, which works fine, but I really don't think I need it. I just sewed a diaper together using this method, and it worked great. No slipping, sliding side to side, stretching, nothing. I did carefully guide the fabric to be sure things were lining up well, and I would recommend always doing so. But I am very happy to have a system that works!
As far as the pattern goes, I hit another step that caused me some pause. This time it was using velcro on the wings of the diaper. The step is quite simple, but I got hung up on the working in the pattern. Many times while sewing I have come across the term "right-sides together." Simple enough. In this pattern, the author uses the term "wrong-sides facing." On an earlier step in the pattern, the front and back of the diaper pieces were to be sewn together inside-out and then flipped. We were instructed to put the pieces "wrong-sides facing." So I translated this to mean right sides together. So, wrong sides facing out, I figured. No problem. But when it came to the velcro on the wings, the instructions said to put the hook and loop pieces "wrong-sides facing." HUH? The velcro tab needed to end up being wrong-sides together, and stitched together this way. How on earth do you start that with right sides together?? I could not for the life of me figure out how that would work. I ended up stitching the pieces together wrong-sides together, then sewing the tab onto the wings. Which was just as it was to be done. So what am I missing here? I always assume it's something I'm not getting, not a mistake in a pattern, and maybe it will suddenly make sense. But not yet. Anyhow, the diapers are coming together well at this point, and I am very happy with them.