Monday, February 28, 2011

Kids PJ Pants

 Simple pj bottoms for the kids. My daughter is very particular when it comes to fabrics, so I let her choose now. She loves these and now wants a top to match. =)
When ya make something for one, ya make something for the other, right? PJ pants for my dear son.

Thursday, February 10, 2011

Guess What I'm Making! Secret Revealed! ;)

I thought it might be fun to play a little guessing game. I am making something, well, two somethings actually. They are the same thing with slight variations. As I create the things, I will post pictures of the process. See if you can guess what I'm making!

Oh I just love fabric. I could spend a fortune on it and hours - days - looking at it. That may seem strange to some of you, but there are those of you who know what I mean. It's love.

Here are the fabrics for this project. The top one was bought at the same time but is not part of this project. The greens go together, and the pinks/stripes go together.


Here's a close-up of one of the pinkies. Cute, eh? =)


Coordinating fabric for the butterfly/ladybug fabric.


Pressing these pieces....


For the other one.... cutting the greens. =)

That's it for right now..... any guesses yet? Remember, there are two of "them" being made at once. More pictures and hints to come!


A little stitchin' here and there.....


I strayed from the tutorial here. I'm adding some fusible interfacing to add a bit of stiffness rather than using pre-quilted fabric.


All of my pieces are ready to be put together!


Right sides together... I am straying from the tutorial again here. Rather than put the pieces together wrong sides together with binding, I'm stitching them together inside-out and flipping them.


Stitched and flipped. Just needs to be top-stitched. Still confused? You have until tomorrow to guess! ;) (When I'll have time to finish it)


Ok, the day has come to reveal what I've made! It's a......... Crayon Roll! It's a double-sided crayon roll for a young girl who has a bunch of pastels she'd like to tote around. I did not make one large enough to hold 36 of them (!!) because I thought the roll would end up too bulky, but this one holds 26, which is quite a few. If you look closely at this photo, you can see my pencil and sewing marker demonstrating how it works. ;)

Fold it in half like this before you roll. Nothing can escape! Now roll it up, tie the ribbons together....


Et voila! =D

Now I must get to work on the second one!


The pieces...


Putting them together...


I like how this came out!


I didn't have a crayon, but you get the idea.


Love it. I hope the "requester" does!


 Got a request for dinos and bold colors. My daughter said this fabric was the one, and she was right!


Cute.


Not sure about the ribbon. I mean, the color is great with this fabric, but perhaps it's a bit wide? I dunno. Anyhow, I'm happy with it. =)


Tuesday, February 8, 2011

Children's Taggie Security Blanket SEWING TUTORIAL

Taggie Blankets are quick and easy to make, and make a great gift!

Supplies: 1/2 yard of cute fabric. If you want the front and back to have different patterns or colors (as I did on this one) buy two pieces.

Coordinating thread

3 or more types of ribbon. Use cloth ribbon, not craft ribbon. Varying widths and textures are fun. You will need a minimum of 3" of ribbon for each loop. I used 3 kinds of ribbon, so I had 12" of each.

Sewing machine


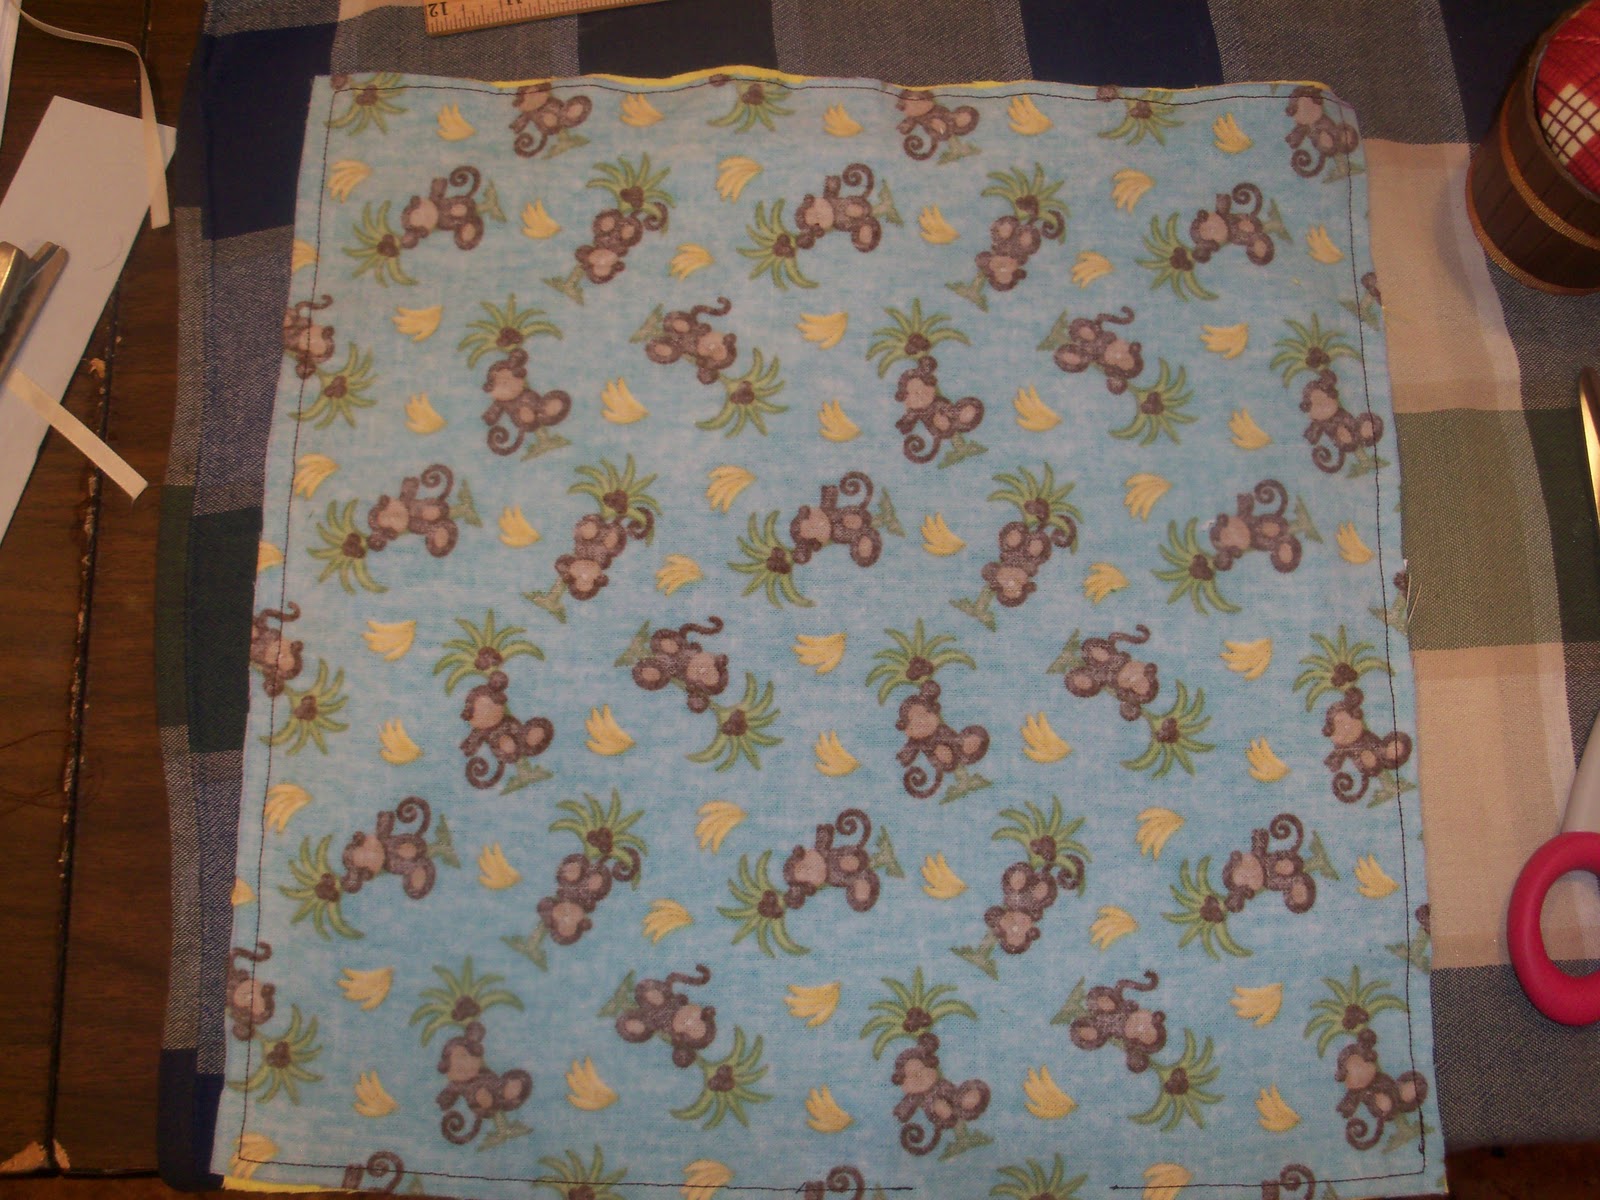
STEP 1: Lay out your fabric, iron it, and cut the size you want, plus about 1/2". I cut out 13 3/4" squares, and I had just enough of my monkey fabric to get that size.


Here's my coordinating piece. It should be the same as the other piece.


STEP 2: Lay the two main pieces RIGHT sides together. Measure each side and mark a small dot on the half-way point. Then measure the half-way point between that dot and each edge, and place a dot at those place. Do this for each side. You will be placing the ribbons at these points. (NOTE: I used 3 ribbons per side. If you choose to use more, place your dots accordingly...make sense?)


STEP 3: Cut 12 (or more) 3" pieces of ribbon. Fold each piece such that the pretty side is OUT. You will be placing the ribbons pieces INSIDE the square, such that the raw edges of the ribbons line up with the raw edges of the blanket. I have been putting the same type of ribbon at the same spot on each side, but you do what you like. Pin the ribbon pieces at each dot around the blanket.


STEP 4: Here's the other side. Stitch around the edge using a 1/4" seam allowance. (You want to be sure to stitch the ribbon ends into this seam, so farther from the edge is ok, but closer is not. You could end up with escapees, which is a drag! But if you do stitch around, and there is a ribbon that has gotten away, just stitch it again, a little further down. Does that make sense?? Make sure to leave an opening to turn the blanket right side out. You'll need to leave the opening between ribbons. Just make sure the ribbons are stitched securely, and your hole isn't tooooo small. Mine are probably just over 2" wide usually. Now BEFORE you flip your blanket...

STEP 5: Clip the corners. They'll be neater when your turn the blanket right side out. Now.... turn it! (Fun part)


I would suggest pressing your blanket to straighten out the sides and corners. You will be stitching the turning hole closed, too, so make sure to press that the way you want it. On this blanket, I double stitched. You want those ribbons nice and secure, as it is likely to get washed and handled a lot. I stitched very close to the edge, then again about 1/4" in from the first stitching line.


Wrap it up! =)

Questions? Leave me a note and I'll get back to you asap. Feel free to share, just give a shout to my blog, eh? ;)


Monday, February 7, 2011

Taggie Blanket

I really needed a project that was pretty straight-forward, and quick to do. I'm happy with how it came out. I'm going to offer this one to the masses, then make one for my nephew, who is due in July. =D

Snuggle flannel on both sides, and three ribbon types, placed in the same order on each side. Guess I was feeling a little, uh, anal tonight. Anyhow, it flows!

Sunday, February 6, 2011

Thoughts of Valentine's

Somewhere along the line I signed up to received emails from All Free Sewing (.com.) Just about every day I get one with links to free sewing patterns and tutorials. This one came along a day or two ago, and I thought it was really cute. It's a sewn tic tac toe game. The front is made with felt (I used fleece b/c that's what I had) and ribbon. The game board is stitched to another piece of felt (fleece) with a flap on top, making it a pocket for the pieces. (cute idea, eh?)


Here's the pocket...


Here's a close-up of some of the pieces. I still have to do the opponent pieces. I think these are cute, with the contrast color in back cut with pinking shears.

I just love the idea of something fun that isn't filled with sugar! =) Mine doesn't look as neat as the one in the email, but maybe that's just cuz I'm too much of a perfectionist. Anyhow, something different! And fun to make.

I had just enough time tonight to make one "x" =)